
Refurbished Pathology Equipment
How to Choose the Best Vibrating Microtome for Your Lab
Choosing the best vibrating microtome starts with the tissue, not the catalog. A soft brain slice, a plant stem, and a thick living specimen place different demands on blade control and sample support. Histologist John A. Kiernan’s published guidance on tissue preparation points to a practical principle: match the method to both the specimen and the research question. That principle matters here. A suitable instrument should produce consistent sections without adding avoidable compression, tearing, or vibration.
Small details can shape the result. Consider the thickness range your protocols require, the blade’s travel and speed settings, and how securely the specimen sits in its holder. Check whether the instrument’s bath can maintain the temperature your tissue needs. Think about the bench, too: a compact unit may fit neatly beside a microscope, while a larger system may better suit frequent, varied work. No single model wins every time.
This guide explains how to compare those features, assess ease of setup, and plan for cleaning, training, and service support. It also considers what matters when budgets are tight. A low purchase price can hide practical costs, such as specialized accessories or limited local support. Ask for a demonstration using a representative sample, if possible. Watch the cut. Inspect the sections. Then weigh the results against your lab’s real workload, not an idealized specification sheet. A careful choice can make sectioning more repeatable, but it cannot replace sound specimen preparation or operator judgment.
Define Your Laboratory’s Sectioning Requirements
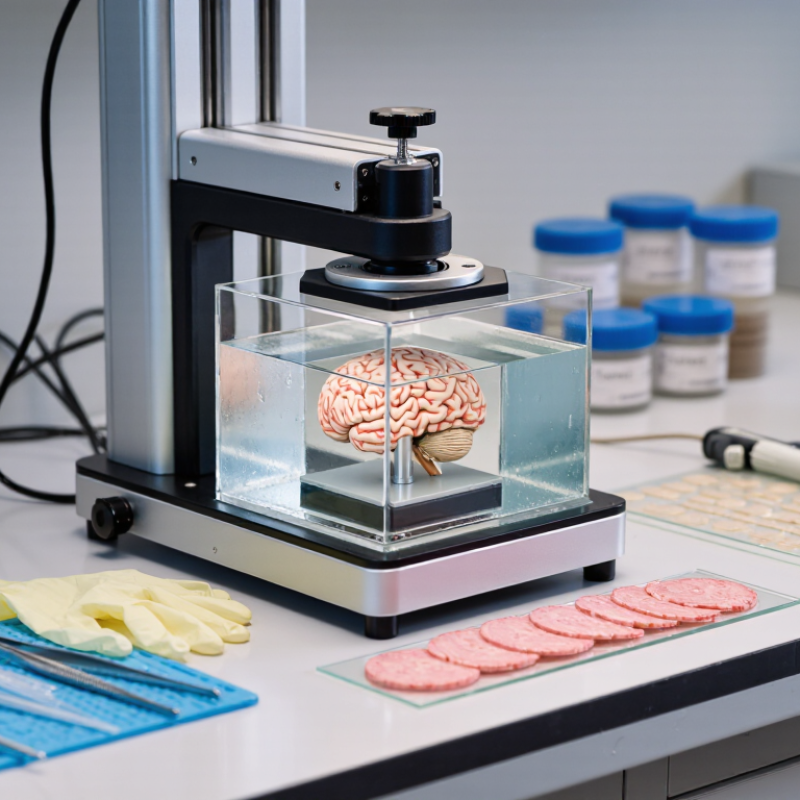
Start with the specimen, not the machine. Record tissue type, dimensions, firmness, and whether it must remain viable. A fresh brain, soft organ, and fibrous plant stem place different demands on the blade. Set target thickness and acceptable variation before comparing instruments. Ting et al. (2014, Journal of Visualized Experiments, e51709) describe preparing acute mouse brain slices at 300 µm. Treat this as a published example, not a universal setting. Your assay may require thinner sections or thicker slices that preserve intact structures.
Note the largest sample block, desired section width, daily sample count, and trimming time. Check whether your workflow needs chilled buffer, adjustable vibration amplitude, stable low-speed cutting, or specific sample holders. For delicate live tissue, prioritize vibration control and temperature management. For routine sections near 300 µm, focus on repeatable feed and thickness control. Keep a trial log of blade type, speed, amplitude, buffer temperature, and defects. Small tears matter. One specimen may cut cleanly while the next behaves differently; that variability can expose gaps in your requirements. Review the criteria with the person who will section samples each week.
How to Choose the Best Vibrating Microtome for Your Lab - Define Your Laboratory’s Sectioning Requirements
| Requirement | Questions to Define | Practical Starting Point | Why It Matters When Choosing |
|---|---|---|---|
| Specimen type and condition | Will you section fresh, fixed, or otherwise treated tissue? What species, organ, and tissue consistency will you handle? | Vibrating microtomes are commonly used to section hydrated, unembedded tissue without freezing. Confirm that the instrument and blade setup suit your specific specimen. | Tissue hardness, fixation, and preparation can affect cutting quality, required settings, and the risk of compression or tearing. |
| Target section thickness | What thickness do your downstream assays require, and how much variation can they tolerate? | Brain slices for acute electrophysiology are often prepared at roughly 250–400 µm. Other applications may require thinner or thicker sections; verify the usable range for the intended tissue and method. | The required range and adjustment increments should match your protocol. A thicker-section capability alone does not guarantee uniform sections at every setting. |
| Specimen dimensions | What are the largest tissue block, sample holder, and cutting area you need? | Measure the largest prepared specimen and allow room for mounting, trimming, and blade travel. Compare those measurements with the instrument’s usable specimen and bath dimensions. | An undersized stage or bath can limit sample orientation, blade clearance, or the size of tissue that can be sectioned in one setup. |
| Application and section quality | Are sections intended for electrophysiology, imaging, histology, or another assay? Which defects are unacceptable? | For living acute slices, prioritize a stable, hydrated cutting environment and smooth, repeatable cutting. Set acceptance criteria for integrity, thickness consistency, and usable area. | Different assays place different demands on tissue viability, morphology, and section consistency, so the intended endpoint should guide the configuration. |
| Cutting speed and throughput | How many specimens and sections must be prepared per session? Are protocols shared among users? | Estimate weekly sample volume and typical setup, cutting, and cleaning time. Look for controls that make the required speed and settings easy to reproduce. | Throughput depends on the whole workflow, including mounting and specimen preparation—not just the cutting rate. Repeatable controls can reduce variation between operators. |
| Blade and holder requirements | Which blade types are compatible, and how are blades installed and aligned? | Check the specified blade geometry, holder compatibility, availability of replacement blades, and whether the holder supports the tissue and cutting approach used in your protocol. | A suitable, sharp blade and reliable alignment help reduce tissue damage. Compatibility should be confirmed before purchase rather than assumed. |
| Vibration and feed control | Can the cutting parameters be adjusted and repeated across users or experiments? | Review the available vibration, amplitude, frequency, and feed controls, along with their adjustment ranges and repeatability. Confirm which parameters are specified for the instrument. | Cutting behavior depends on the combination of tissue, blade, and settings. Clear, reproducible controls make protocol optimization and transfer between users easier. |
| Bath and temperature management | Does your protocol require chilled buffer, continuous perfusion, or another temperature-control approach? | Confirm bath capacity and whether the system accommodates the cooling or buffer-management method required by your workflow. A cooled bath may be useful for temperature-sensitive preparations. | Temperature and hydration can affect tissue condition during preparation. Cooling performance and compatibility should be evaluated under your actual operating conditions. |
| Ease of use and cleaning | How often will the instrument be cleaned, moved, or used by different operators? | Assess access to the bath and specimen holder, cleaning instructions, setup time, control visibility, and the effort required to secure and remove specimens. | Practical setup and cleaning affect daily workflow, user consistency, and the ability to maintain a clean, reliable cutting environment. |
| Facilities and verification | What are the bench-space, electrical, service, and training requirements? Can performance be evaluated with representative samples? | Check the instrument footprint, power requirements, local service availability, training options, and any documented verification procedures. Request a demonstration or test using representative tissue where possible. | Confirming fit and performance in your laboratory helps reveal workflow constraints and gives your team a chance to assess section quality before committing. |
Related Posts
-
China Top Vibrating Microtome Manufacturers and Suppliers
-
How to Use a Leica VT1000 S Vibrating Blade Microtome
-

7 Tips for Choosing a Vibrating Blade Microtome?
-
7 Tips for Buying a Thermo Microtome Online?
-

Top 5 Best Refurbished Microtomes for Precision Cutting in 2026?
-
Top Features of Sakura Microtome for Precision Tissue Sectioning?
