10 Essential Tips for Using a Sliding Microtome Effectively?

Using a sliding microtome can be a game-changer in histology and research. This tool allows you to obtain ultra-thin sections of specimens. Mastering its use is essential for achieving optimal results.

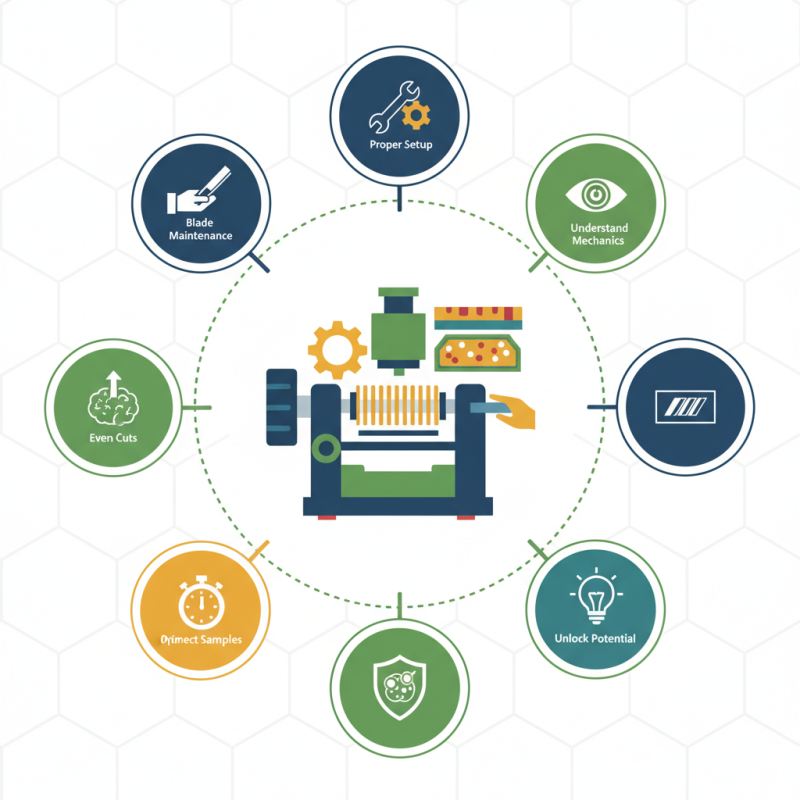
However, many users struggle with the nuances of a sliding microtome. Proper technique and careful handling are crucial. The wrong approach can lead to uneven cuts or damaged samples. A good understanding of the device’s mechanics goes a long way. Setting it up correctly is vital. Familiarization with blade maintenance is equally important.

Navigating its features can be overwhelming. Some tips may seem simple but can make a significant difference. Remember to reflect on your technique regularly. Continuous improvement leads to better results. A sliding microtome is a powerful ally when used effectively. Understanding this tool unlocks its full potential.

10 Essential Tips for Using a Sliding Microtome Effectively?

Understanding the Basics of a Sliding Microtome

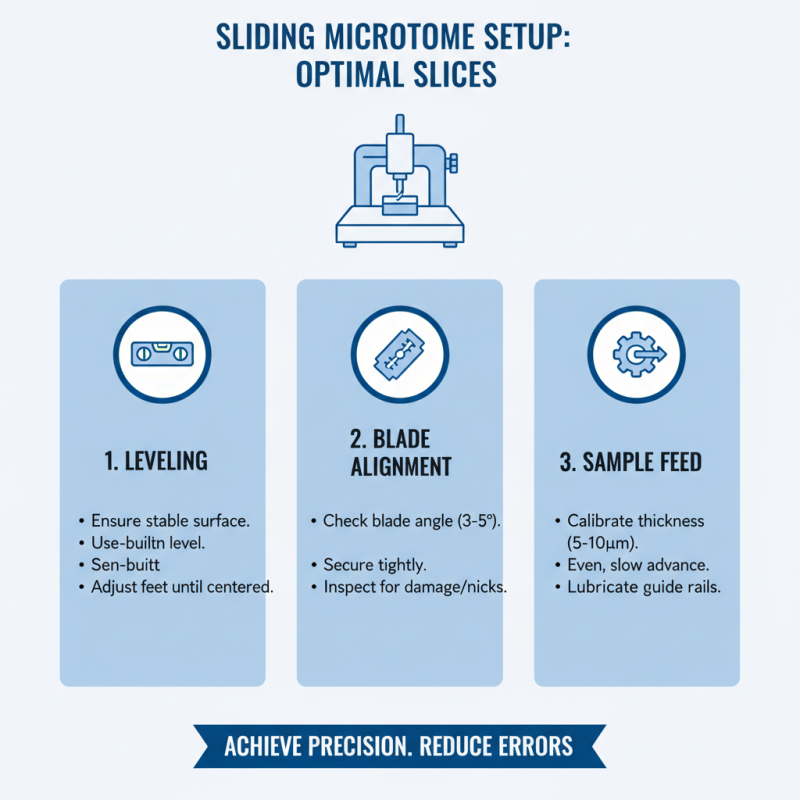
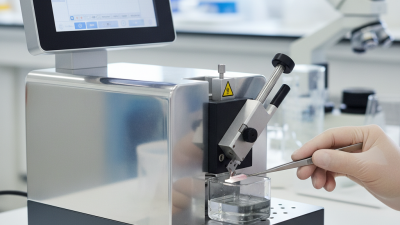
A sliding microtome is a vital tool for precision slicing in histology. It helps create thin sections of tissue for examination. Understanding its basics is essential for both novice and experienced users. The design allows for adjustable slicing thickness, which is crucial for different tissue types. The blade must be sharp and ideally replaced regularly. Dull blades can lead to uneven slices, affecting the quality of the results.

Proper positioning of the sample is another critical factor. Ensure the tissue is securely mounted. If not, you might end up with misaligned sections. It's also important to maintain a clean workspace. Dust and debris can compromise your samples. Even slight contamination can lead to inaccurate results. Regular maintenance of the microtome is key, but overlooked by many. Sometimes, users forget to calibrate the instrument properly. This can lead to discrepancies in thickness measurements, adding another layer of complexity to your work.

Experimenting with different slicing speeds can yield better results, but this requires patience. Fast slicing may seem efficient. However, it usually results in tearing or crushing the sample. Finding the right speed takes practice. Consider documenting your slicing techniques. Creating a log can help identify what works best for your materials. Reflection on your techniques will improve your skills over time.

10 Essential Tips for Using a Sliding Microtome Effectively

Tip Number Tip Description Benefits
1 Ensure proper alignment of the cutting blade. Improves slicing accuracy and consistency.
2 Maintain a sharp blade using regular sharpening techniques. Reduces distortion and enhances sample quality.
3 Use appropriate sample embedding materials. Ensures better tissue support and easier slicing.
4 Control the sectioning speed based on the sample type. Achieves uniform thickness and reduces artifacts.
5 Keep the microtome clean and well-maintained. Prevents contamination and equipment malfunction.
6 Use anti-roll plates to stabilize soft tissues. Ensures accurate sectioning and minimizes damage.
7 Store samples correctly post-sectioning. Preserves samples for future analysis and usage.
8 Adjust cutting angles for different types of tissues. Optimizes section quality and minimizes tears.
9 Use cryostat settings for frozen samples. Allows for precise sectioning of delicate specimens.
10 Document sectioning settings and results. Facilitates reproducibility and quality control.

Choosing the Right Blade for Precise Cuts

Choosing the right blade for a sliding microtome is crucial for achieving precise cuts. Blades come in various materials and sharpness levels. Stainless steel blades are common, known for durability. However, they may dull quickly with extensive use. Think about the type of specimen you'll be cutting. Softer tissues might benefit from a thinner, sharper blade. Conversely, harder samples require more robust blades.

It can be tempting to use a blade in poor condition to save time. A dull blade might create uneven cuts. Spending a moment to replace it can improve overall quality. While it’s easy to grab the same blade repeatedly, reflection on cut quality is vital. Experimenting with different blades may yield surprising results. You might find that a new blade type enhances your workflow significantly.

Remember to assess the blade angle as well. The cutting angle affects the slice's smoothness. A slight adjustment can make a world of difference. It's common to overlook the importance of blade choice. Yet, each microtome project may demand a unique approach. A little patience can lead to better outcomes. Don't rush; precision is the key.

Setting Up Your Sliding Microtome for Optimal Performance

10 Essential Tips for Using a Sliding Microtome Effectively?

Setting up your sliding microtome properly is crucial for optimal performance. A well-calibrated microtome ensures precision in your slices, leading to accurate results. According to recent industry reports, a significant portion of users frequently struggle with inconsistent slice thickness due to improper setup. So, let’s explore some essential tips.

Check the blade sharpness before starting your work. Dull blades can lead to tearing and uneven cuts. This can make your histological analysis less reliable. Aim for a cutting angle between 30 to 45 degrees. Adjust the microtome's height for better ergonomics. This will help minimize fatigue during extended slicing sessions.

Ensure your specimen is properly embedded, preferably in a medium that maintains structural integrity. Use a coolant to minimize heat buildup during slicing. This helps preserve cell morphology. Remember, even minor adjustments in temperature can directly affect slice quality. Pay attention to environmental factors, such as humidity and temperature, as they can influence both the microtome and the sample.

Consistency in setup processes cannot be overstated. A slight oversight today could lead to frustrating results tomorrow. Taking time to adjust and reflect on your setup can save substantial effort in the long run.

Techniques for Maintaining Specimen Integrity during Cutting

Maintaining specimen integrity during cutting with a sliding microtome is crucial for reliable results. Proper technique helps avoid issues like distortion or uneven sections. Studies indicate that well-prepared specimens can enhance reproducibility by 30%.

Ensure the specimen is adequately fixed and dehydrated. Inadequate fixation can lead to a fragile sample, resulting in uneven cuts. Consider using optimal embedding mediums; they should support the specimen effectively. Regular calibration of your sliding microtome ensures precision cutting.

Utilize gentle pressure when slicing. Too much force can crush or compress delicate tissues, compromising their integrity. Also, regularly inspect blades for sharpness. Dull blades create ragged edges, negatively affecting section quality. Consider controlling environmental factors. High humidity and fluctuating temperatures can impact the samples during the cutting process.

Experimenting with different tissue orientations might yield better results. Sometimes, what seems a minor adjustment creates significant benefits. Careful attention to technique is necessary, as even a small oversight can lead to a breakdown in sample integrity, ultimately affecting research outcomes.

Cleaning and Maintaining Your Microtome for Longevity

Cleaning and maintaining your microtome is essential for optimal performance. A clean microtome supports precise tissue sectioning. Regular maintenance can extend the lifespan of your equipment. According to a recent industry report, nearly 30% of microtome-related issues stem from inadequate cleaning practices. This highlights the importance of proper care.

Start with a routine cleaning schedule. Disassemble the microtome according to the manufacturer’s instructions. Use a soft, lint-free cloth to remove any debris. Avoid harsh chemicals; they can damage sensitive components. Ensure that blades are cleaned immediately after use to prevent staining and rust.

Tip: After cleaning, inspect for small wear marks or damage on the microtome’s parts. Such issues can lead to larger problems if ignored. Be mindful of the microtome’s environment. Dust and humidity can compromise its function, showing the need for an appropriate workspace.

It’s not just clean; it's about maintaining precision. Regular calibration checks can prevent costly mistakes. Monitor the condition of your blades. Dull blades can produce uneven sections, impacting your results. Remember, attention to detail in maintenance translates to better performance and longevity.

preloader