Using a Leica VT1000 S vibrating blade microtome requires more than pressing the start button. It demands careful tissue handling, steady observation, and a willingness to adjust settings. The instrument is designed for controlled sectioning of soft, fixed specimens, especially brain, spinal cord, and other delicate tissues. Its vibrating blade can reduce compression, but it cannot rescue poorly prepared samples.
Dr. John A. Kiernan, a respected histology author and neuroanatomy educator, has emphasized, “A good section begins with good preparation.” This principle fits the Leica VT1000 S vibrating blade microtome closely. Before cutting, the operator should inspect the specimen, confirm secure mounting, and choose a suitable buffer level. The blade must remain clean and correctly aligned. Small changes matter. A slightly excessive amplitude may produce tearing. A slow advance may improve continuity, but it can also waste valuable tissue.
Watch the section as it forms.
Practical experience often reveals imperfections that manuals cannot predict. Tissue hardness may vary within one block. The first few sections may look uneven. That does not always indicate equipment failure. It may reflect incomplete fixation, an unsuitable blade, or excessive cutting pressure. Record the settings, including speed, amplitude, section thickness, and temperature. Then make one controlled change at a time. This approach supports repeatability and helps distinguish operator error from specimen limitations. Used patiently, the Leica VT1000 S becomes a precise laboratory tool rather than a shortcut.
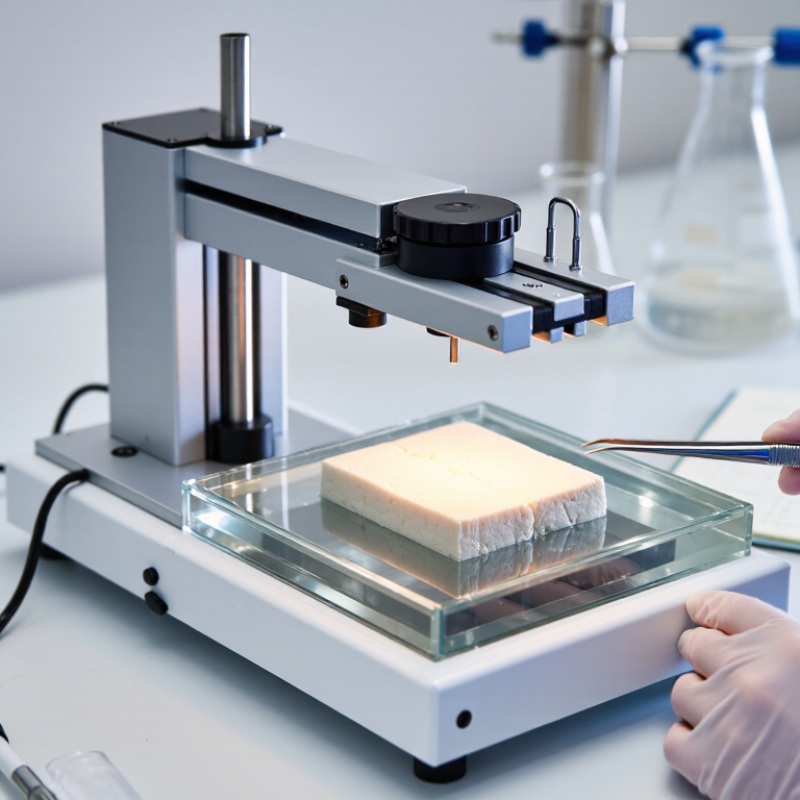
A vibrating blade microtome prepares delicate tissue sections without relying on freezing or paraffin embedding. Its main components include a specimen holder, oscillating blade, adjustable feed system, and buffer-filled cutting bath. The blade moves rapidly from side to side while advancing through the sample. This vibration reduces compression and helps preserve soft structures. The operator controls cutting speed, blade movement, and section thickness according to tissue firmness. Fresh brain tissue, plant samples, and other fragile specimens require different settings.
In practical use, secure the sample firmly and keep the cutting surface level. A stable buffer bath prevents drying and supports clean section transfer. I have found that excessive blade pressure creates tearing, even when the sample looks well prepared. My first sections were uneven because I advanced the specimen too quickly. That mistake showed me how closely section quality depends on small adjustments. Inspect each section under suitable lighting before changing several settings at once. Otherwise, you may not know which adjustment improved the result.
Tips:
Trim the sample into a clean block before mounting. Use a sharp, undamaged blade. Remove bubbles from the bath when possible. Begin with gentle movement and moderate advancement. Keep notes of settings, tissue condition, and section quality. The best setting is not always the fastest one. Verify electrical safety, blade handling procedures, and maintenance instructions before operation.
Preparing a vibrating-blade microtome for sectioning requires controlled setup, not hurried adjustment. Begin by inspecting the blade, specimen holder, bath, and waste tray. Remove residue from the previous run. Even a thin film can change cutting resistance.
Use freshly prepared buffer or chilled water, according to the validated laboratory protocol. Secure the tissue block firmly, with its cutting face parallel to the blade path. The World Health Organization’s Laboratory Biosafety Manual, 4th edition, emphasizes documented risk controls, equipment checks, and contamination prevention before laboratory work begins. Record the specimen identity, buffer, temperature, blade condition, and selected cutting settings.
Keep the tissue submerged at a stable depth. Too little liquid allows drying; too much can reduce visibility and control. Set the blade speed, oscillation amplitude, and section thickness conservatively, then adjust one variable at a time. A 2022 review in Frontiers in Neuroanatomy notes that vibratome protocols commonly use sections from approximately 30 to 300 micrometres, depending on tissue type and downstream staining. Thinner is not always better.
Watch the first few passes closely. Smooth ribbons, clean edges, and minimal compression indicate a workable setup. If the section wrinkles, stop and reassess the clamp, blade angle, and tissue support. I sometimes blame the blade too quickly; poor alignment is often the real problem. Document the correction. ISO 15189:2022 supports traceable procedures, equipment records, and evidence-based quality control in medical laboratories.
Mounting begins with a clean, stable specimen holder and a tissue block trimmed to fit. I check the block’s surfaces under good lighting before placing it. Excess embedding medium can tilt the sample and produce uneven sections. Apply a thin, even layer of suitable adhesive or embedding medium. Press the tissue firmly into position, then allow it to set according to the material’s instructions.
Orientation controls the final view. I align the tissue so the desired cutting plane faces the blade, keeping the surface as level as possible. Small angles matter. A tilted block may create compression, chatter, or sections with changing thickness. I gently test the holder by hand before starting the instrument. If the tissue shifts, I remount it rather than trying to correct it during cutting. That saves samples, although I sometimes rush this decision.
Tips: Keep the specimen cold when appropriate, but avoid condensation on the holder. Mark the intended cutting face before mounting. Use a magnifier to inspect gaps beneath the tissue. Tighten the holder evenly, without forcing the clamp. Record the orientation in your lab notes, including the anatomical direction and embedding medium. A short practice cut can reveal poor alignment early. Perfect alignment is not always possible, so document any compromise clearly.
A vibrating blade microtome produces clean sections when the cutting parameters match the tissue. Begin with a firm, correctly oriented specimen block. Secure it without crushing the edges. Use chilled buffer around the sample to reduce drying and friction. A blade angle near 15 degrees often provides a useful starting point, but tissue density may require adjustment.
Set the section thickness according to the experiment. For delicate brain tissue, 50–100 micrometres can preserve larger structures and reduce tearing. Lower vibration speed may protect soft tissue, while a moderate speed can improve movement through tougher regions.
Keep the blade travel steady and avoid excessive forward pressure. Watch the buffer surface closely. Bubbles can lift or distort sections.
I check the first few slices under a stereomicroscope before collecting a full series. Smooth ribbons suggest stable speed, suitable amplitude, and adequate cooling. Ragged edges often indicate a dull blade, poor clamping, or an overly aggressive setting.
I have sometimes blamed vibration when the real problem was an uneven specimen face. That mistake is easy to repeat. Record thickness, speed, amplitude, buffer temperature, and tissue response in the laboratory log. Small changes matter.
When sections compress, pause and inspect the block rather than immediately increasing power. A slower setting may produce better morphology, even if the process feels less efficient.
After each session, I remove the specimen, holder, and loose tissue fragments before cleaning the vibrating blade microtome. I wear suitable eye protection and disposable gloves during this work. The blade remains dangerous, even when the motor is off. With power isolated, I wipe the stage and surrounding surfaces using a lint-free cloth. Never wipe across the blade edge. Use only cleaning agents approved by your facility and the equipment manual.
Moisture near electrical controls can cause serious faults. I keep those areas dry. A soft brush helps remove debris from grooves and moving joints. I inspect the blade clamp, specimen bath, cables, and fasteners for wear or damage. The cutting arm should move smoothly, without unusual noise or vibration. I once rushed this inspection and missed tissue under the clamp. That small oversight affected the next section.
For routine maintenance, I record cleaning dates, blade changes, lubrication, and observed problems. Lubricate only specified points, and avoid excess oil near specimens or sensors. Do not adjust internal parts unless trained and authorized to do so. Before shutdown, I lower the cutting arm, remove the blade if required by local procedure, and clear the work area. I then return controls to their safe settings, switch off the instrument, and disconnect power when appropriate. Leave the area dry and ready for the next operator. Check the manual again. Details can vary.