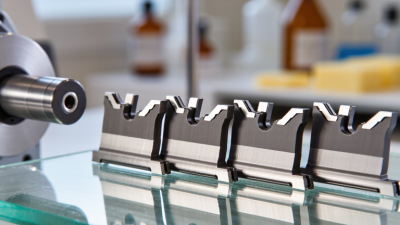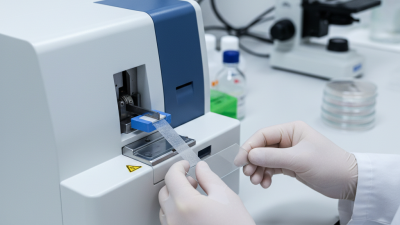
A thin section begins with a precise cut, but dependable results also depend on the support behind the blade. The microtome blade holder affects blade seating, cutting stability, and how confidently a technician can reproduce a section. A loose clamp or unevenly seated blade may show up as chatter, compression, or torn tissue on the slide. Small details matter.
The need for reliable tissue preparation is substantial. The International Agency for Research on Cancer’s Global Cancer Observatory estimated 20 million new cancer cases worldwide in 2022. That figure describes cancer incidence, not microtome performance; it does, however, underscore the importance of dependable diagnostic workflows. No widely accepted industry report directly compares blade-holder accuracy across brands, so purchasing claims deserve careful checking. Look for secure clamping, compatibility with the microtome and blade type, straightforward cleaning, and adjustments that remain stable during routine sectioning. Then test the holder with the specimens and workflow your laboratory actually uses.
A useful choice is rarely the most expensive one. Fit matters. So does maintenance. John D. Bancroft is a recognized histotechnology author, but I cannot verify a holder-specific quotation from him. Rather than invent a quote, this introduction keeps the distinction clear: recommendations should be supported by documented specifications, validated procedures, and observed laboratory performance. That may feel less polished. It is more trustworthy. A holder that suits one setup may perform differently in another, so practical evaluation remains essential.

A microtome blade holder is the adjustable assembly that secures a disposable blade and positions its edge against a tissue block. It helps control blade angle, exposure, and stability during sectioning. In practice, these details affect whether a ribbon forms smoothly or breaks into uneven strips. The holder also helps keep fingers away from the cutting edge during routine handling. It matters.
Compatibility is essential: the holder must fit the microtome and blade type, while its clamp should hold the blade firmly without shifting. Standard histotechnology references, including Carson and Hladik’s Histotechnology: A Self-Instructional Text, describe routine paraffin sections in the range of about 3–5 μm. At that scale, small changes in blade position can show up as chatter, compression, or inconsistent thickness. A good holder cannot fix every problem; dull blades, poor block conditioning, and rushed adjustments still matter. That is worth remembering.
Tips: Check the clamp before cutting, and confirm the blade sits evenly. Start with a clean, dry holder. If sections wrinkle or chatter, inspect the blade and block before changing several settings at once. Keep a simple record of adjustments; it may reveal a pattern you missed.
A microtome blade holder affects how steadily the cutting edge meets the tissue block. A firm, even clamp limits blade movement; poor alignment or excess blade exposure can encourage chatter, compression, and score lines. The result may be visible as alternating light and dark bands, or as sections that wrinkle while floating on the water bath. Small changes matter.
Routine paraffin sections are often cut at 3–5 µm, so a slight vibration can disrupt a large share of the section’s thickness. The World Health Organization’s Laboratory Quality Management System handbook (2011) summarizes reported laboratory-error ranges: 7–13% occur during the analytical phase. This is not a microtomy-specific rate, but it shows why the cutting step deserves attention. A stable holder helps control one source of variation; it cannot fix a dull blade, unsuitable clearance angle, or poorly supported block. A holder is not magic.
Check that the clamp grips evenly and that the blade sits securely before cutting. If chatter persists, inspect the block temperature, blade condition, and cutting angle too. I would not blame the holder without checking those factors; that shortcut can hide the real cause. Conversely, a loose holder can make other adjustments seem ineffective. Calibration and careful observation still matter.
A suitable microtome blade holder should match the instrument and blade type, clamp securely, and allow repeatable angle adjustment. A loose clamp can cause chatter; an inconsistent angle may leave compression or uneven ribbons. Check whether the holder accommodates the sectioning tasks your lab performs, including routine paraffin work or harder specimens. Also assess blade-change safety, hand clearance, corrosion resistance, and how easily wax and debris can be removed. Smooth adjustment knobs matter when gloved hands are cold or damp.
Reported laboratory error rates are not specific to microtomy, but Plebani’s review in Clinical Chemistry and Laboratory Medicine (2006) cites overall laboratory error rates of 0.1–3.0%. That figure is a reminder to control each step, not proof that a particular holder reduces errors. For a practical comparison, test holders using the same block, blade, and section thickness. Note ribbon consistency, vibration, and how often you need to readjust.
Tips: Before purchase, ask staff to load a blade, lock the holder, and clean it. Watch for awkward reaches or slow adjustments. Keep one point in mind: a feature that looks precise on paper may feel clumsy at the bench.
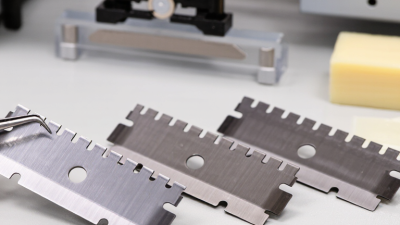
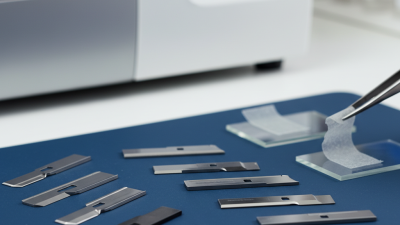
A microtome blade holder should match the blade’s type, dimensions, and profile. Check the instrument manual and holder specifications before ordering. A blade that is too wide, narrow, or thick may not seat securely. Never force a blade into a clamp. A snug fit matters. The cutting angle and blade exposure also affect section quality. If sections show repeated compression or uneven ribbons, check the setup before assuming the blade is defective.
Safety belongs in the selection decision, not as an afterthought. Look for a holder with a reliable clamp and a guard that covers the exposed edge when the blade is not in use. During changes, secure the handwheel and follow the instrument’s procedure. Use the recommended blade-handling tool; keep fingers away from the cutting edge. A holder can feel secure yet still be mounted incorrectly, so verify alignment before cutting. It is easy to overlook this small check on a busy day.
Tips: Confirm blade compatibility using the exact holder model and blade dimensions. Replace a worn or damaged clamp, and never cut with a loose blade. Keep used blades in a suitable sharps container. If fit or movement feels uncertain, stop and consult the manual or a qualified supervisor.
Why Choose the Right Microtome Blade Holder?
What Care Helps Keep a Blade Holder Reliable?
Reliable performance depends on more than the blade. A clean, secure holder helps maintain consistent sectioning and reduces the chance of blade movement. Before cleaning, remove the blade with an appropriate tool and follow your instrument’s safety procedure. Small steps matter. The CDC’s 2008 estimate found about 385,000 percutaneous sharps injuries annually among U.S. hospital workers. This broad estimate is not specific to microtomes, but it underscores why careful blade handling matters.
After each session, remove paraffin debris with a soft, lint-free cloth and a suitable cleaner. Dry the holder fully; residue or moisture can affect the clamping surfaces. Check the clamp jaw, screws, and alignment for wear, damage, or trapped tissue. Do not force a stiff adjustment. A loose clamp can shift; excessive tightening can damage parts. ISO 15189:2022 calls for documented equipment management, including maintenance. Record cleaning, checks, and any replacement so recurring faults are easier to spot. It is easy to skip that log when the bench is busy. That is exactly when a small fault can go unnoticed.
| Decision or Care Area | What to Check | Why It Matters | Reliable Practice |
|---|---|---|---|
| Microtome compatibility | Confirm that the holder is designed for the microtome model and mounting interface. | A secure, correctly aligned fit helps maintain stable sectioning and reduces movement during cutting. | Check the instrument and holder instructions before installation; do not force an incompatible holder. |
| Blade type and profile | Match the holder to the specified disposable blade type, such as low-profile or high-profile, and the intended blade dimensions. | Blade profiles and dimensions are not interchangeable in every holder; a poor fit can compromise clamping and cutting. | Use only blade types listed as compatible by the holder or microtome manufacturer. |
| Clamping and locking | Check that the blade clamp closes evenly and that locking controls move smoothly and hold securely. | Uneven or loose clamping can allow blade movement, contributing to inconsistent sections and added risk. | Lock the blade according to the instrument instructions. Never test sharpness with a finger. |
| Angle and adjustment range | Review the holder’s available adjustment and the setup recommended for the microtome and specimen. | Cutting geometry affects how the blade meets the specimen; incorrect settings can cause compression, chatter, or tearing. | Follow the instrument procedure and adjust settings in small increments rather than relying on a universal angle. |
| Specimen and workflow | Consider routine specimen types, sectioning method, and whether the workflow requires frequent blade changes. | A holder suited to the work can make setup and blade replacement more consistent. | Choose based on validated laboratory procedures and the holder’s intended use. |
| Before each use | Look for looseness, visible damage, residue, corrosion, or a blade that is not seated correctly. | Early checks can identify conditions that affect stability, cleanliness, or safe operation. | Inspect with the blade protected or removed using the approved blade-handling method; take damaged equipment out of service. |
| Cleaning after use | Remove tissue debris and residue using the cleaning method and agents approved for the holder materials. | Built-up debris can interfere with seating and adjustment; unsuitable chemicals or abrasive tools may damage surfaces. | Remove the blade safely, clean as directed, and dry the holder thoroughly before storage or reuse. |
| Blade changes | Use the holder’s safety features and the laboratory’s approved blade-removal tool or procedure. | Microtome blades are extremely sharp and can cause serious cuts during handling or disposal. | Keep hands away from the cutting edge and place used blades directly into an approved sharps container. |
| Storage and maintenance | Store the holder clean and dry; check fasteners and moving parts for smooth operation. | Careful storage helps limit contamination and corrosion and supports dependable adjustment. | Lubricate or disassemble only when the instrument instructions permit it; follow the laboratory’s maintenance schedule. |