7 Tips for Choosing a Vibrating Blade Microtome?

Choosing a vibrating blade microtome is not simply a matter of comparing prices or impressive specifications. The right instrument should match your tissue type, laboratory workflow, and sectioning goals. Fresh brain, plant stems, and fragile biopsies can behave very differently under the blade. That difference matters.

A reliable evaluation begins with practical questions. Can the system produce clean sections at your required thickness? Does it offer adjustable vibration frequency, amplitude, and cutting speed? A stable specimen bath, comfortable controls, and easy blade replacement can save hours during demanding work. Small details matter. Experienced users also examine temperature control, sample visibility, cleaning procedures, and compatibility with existing accessories. Manufacturer training and responsive technical support deserve equal attention. A technically advanced device becomes less valuable when setup guidance is unclear or spare parts are difficult to obtain.

These seven tips focus on real laboratory decisions rather than marketing language. They consider section quality, operator safety, construction, maintenance, and long-term value. Evidence from published specifications, demonstrations, and user feedback should support each choice. Still, no checklist can predict every laboratory experience. A model that performs beautifully with soft tissue may feel unsuitable for harder specimens. That is an important limitation to recognize. Testing representative samples before purchase remains one of the most dependable methods. Careful comparison can prevent expensive compromises and help researchers choose a vibrating blade microtome that fits their work with confidence.

7 Tips for Choosing a Vibrating Blade Microtome?

Understanding the Working Principles of a Vibrating Blade Microtome

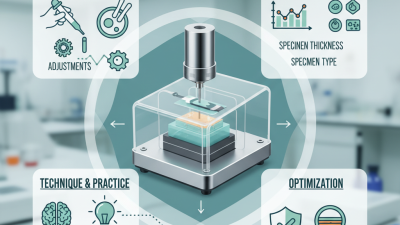
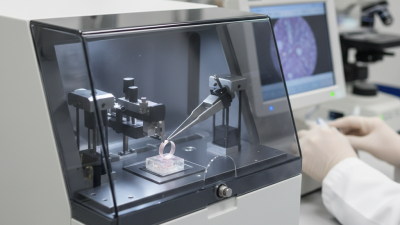
A vibrating blade microtome cuts delicate specimens with a rapidly oscillating blade. The blade moves from side to side while advancing through the sample. This vibration reduces compression and pulling, which helps preserve soft tissue structure. A liquid bath usually supports the specimen and carries each section away. Keep the bath clean and at a stable temperature.

The cutting process depends on several settings. Blade frequency controls the speed of vibration, while advance speed controls section thickness. A slower advance often produces smoother sections, especially with fragile tissue.

Excessive vibration can create uneven edges or unnecessary heating. Check the blade angle, because a small adjustment can change the cutting response. I measure the first few sections instead of trusting the display completely.

When choosing a vibrating blade microtome, examine its control range, stage stability, bath design, and cleaning access. Confirm that the system supports your specimen size and preferred section thickness. A rigid specimen holder matters more than many buyers expect. I once focused on vibration settings and overlooked poor drainage; cleaning became unnecessarily slow. That mistake changed my evaluation checklist. Ask for repeatability data, maintenance instructions, and training requirements. Test the machine with representative tissue, not only an easy demonstration sample. Results can vary.】【。

Matching Blade Vibration Settings to Your Sample Type

7 Tips for Choosing a Vibrating Blade Microtome

Matching Blade Vibration Settings to Your Sample Type

Blade vibration should follow tissue resistance, not a fixed preset. For fresh brain or spinal tissue, begin with moderate frequency and low amplitude. This reduces compression around delicate neuronal layers. A 2022 review in Frontiers in Neuroanatomy reports that vibratome sections commonly range from 30 to 100 micrometres for neural specimens. Thicker sections may tolerate slightly stronger oscillation, but excessive movement can tear cell-rich regions. Watch the cutting edge closely.

Plant stems and leaves usually need firmer support and slower forward movement. Their vascular bundles can catch the blade. Start near 50 to 150 micrometres section thickness, then adjust vibration in small steps. A 2023 methods review in Journal of Neuroscience Methods links cleaner sectioning with stable cooling and controlled blade travel. Keep the specimen cold, especially when using soft animal tissue. Around 4°C is commonly used for chilled cutting baths, although fixation and tissue chemistry change the ideal setting.

Harder samples, such as cartilage or mineralized tissue, require careful testing. More amplitude is not always better. It can create chatter marks and hide microscopic boundaries. That happened in my early trials. I changed the blade angle before reducing vibration, which was the wrong order. Record frequency, amplitude, section thickness, temperature, and embedding medium for every run. ISO 15189:2022 emphasizes validated, traceable laboratory processes, so undocumented “good” settings are difficult to reproduce.

Evaluating Section Thickness, Cutting Accuracy, and Stability

7 Tips for Choosing a Vibrating Blade Microtome

Evaluating Section Thickness, Cutting Accuracy, and Stability

A vibrating blade microtome should be judged by the sections it produces, not its display. Check whether thickness settings match your routine samples. A device may advertise ultra-thin sections, yet perform poorly with soft tissue. Ask for test sections at several thicknesses. Measure them under a calibrated microscope or optical method. Look for even ribbons, clean edges, and minimal compression. Small variations matter.

Cutting accuracy depends on blade amplitude, frequency, approach angle, and specimen support. Fine controls help when alternating between delicate tissue and firmer blocks. The blade should move smoothly without scraping or tearing the surface. A rigid specimen holder reduces drift during repeated passes. Temperature control can also influence consistency, especially in hydrated samples. In practice, compare ten consecutive sections rather than trusting one attractive result. This takes longer.

Stability is easier to assess during extended operation. Watch for frame movement, table vibration, motor heat, and changes in section thickness. Place the instrument on a solid, level surface. Check whether controls remain responsive after continuous cutting. Calibration records, blade replacement guidance, and accessible technical support indicate operational maturity. I once underestimated holder rigidity and blamed the blade for uneven sections. That mistake changed my evaluation checklist. Leave room for user training, because precise equipment still depends on technique.

Choosing Safe, Durable, and Easy-to-Maintain Equipment

7 Tips for Choosing a Vibrating Blade Microtome

Choosing a safe vibrating blade microtome starts with examining its physical safeguards. Look for a stable base, a covered cutting area, and an accessible emergency stop. Safety comes first. The blade holder should lock firmly and allow controlled replacement without forcing the operator’s hands near the edge. Adjustable vibration and cutting speed also matter, because delicate brain, plant, or soft tissue samples may require different settings.

Durability depends on more than a metal frame. Choose equipment with corrosion-resistant surfaces, sealed controls, and a stage that resists repeated loading. Smooth movement reduces uneven sections and mechanical stress. Easy maintenance is equally important. Removable trays, open access to cleaning points, and clear lubrication guidance can save valuable laboratory time. Small details matter. A machine may appear robust, yet poorly placed screws can make routine cleaning frustrating. I would check these features in person whenever possible.

Reliable operation requires practical documentation. Confirm that the manual explains blade alignment, vibration checks, cleaning intervals, and basic fault handling. Calibration records should be simple to complete and easy to review. Ask whether replacement parts and technical support remain available over the equipment’s expected service life. A perfect instrument does not exist. However, a thoughtful choice balances safety, durability, maintenance effort, and sample quality instead of focusing only on purchase price. Training should also be realistic, with operators practicing setup and cleaning before handling valuable specimens.

Comparing Compatibility, Support, and Overall Ownership Costs

Choosing a vibrating blade microtome requires more than comparing purchase prices. Compatibility, service access, and daily ownership costs often shape laboratory performance.

Tip 1: Check specimen compatibility carefully. Confirm the instrument supports your tissue hardness, block size, embedding medium, and required section thickness. A blade that performs well on soft brain tissue may struggle with dense plant material.

Tip 2: Examine the blade movement. Adjustable vibration frequency and amplitude can reduce tearing, compression, and uneven sections. Ask for demonstration data using samples similar to yours.

Tip 3: Calculate the complete ownership cost. Include blades, mounts, calibration, cleaning supplies, training, energy use, and expected downtime. Cheap equipment can become expensive after repeated adjustments.

Tip 4: Investigate technical support before ordering. Reliable help should include installation guidance, operating instructions, and practical troubleshooting. Response time matters when samples cannot wait.

Tip 5: Ask about replacement parts. A missing clamp or damaged blade holder should not stop work for several weeks. Small parts matter.

Tip 6: Review maintenance demands. Some systems need frequent alignment, while others simplify cleaning around the specimen chamber. Record the minutes spent after each session. Real experience is more useful than a polished brochure.

Tip 7: Test user comfort and workflow. Check noise, hand positioning, display clarity, and section collection under normal laboratory lighting. I would not ignore minor frustrations; they accumulate quickly. Also, projected savings may be wrong if staff training takes longer than expected.

preloader